If you're using a Shopify provided or custom theme, you can easily add the Localizer JavaScript Integration code by following the steps below. You can also check out our handy video guide by clicking here.
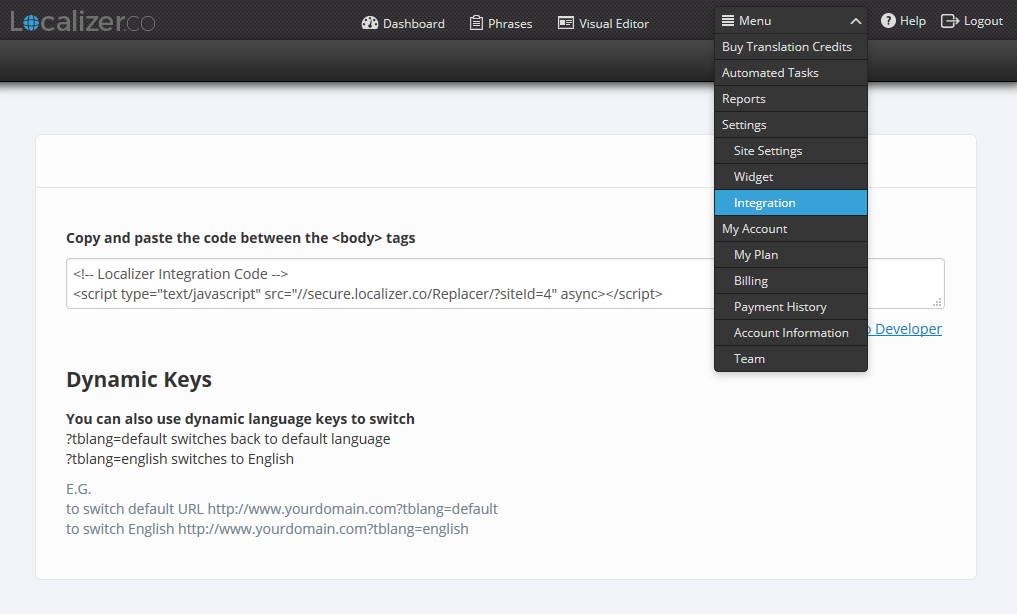
1Login to your Localizer account and copy the JavaScript. (Menu > Integration)
2Log into the Admin section of your Shopify store.
3Click on "Sales Channels" button on the left menu, then click on "Online Store". (You need to have an online store added for this to appear)
4Click on "Themes".
*On some versions of Shopify, there may only be the "Online Store" option on the left hand pane. Click on this, then select "Themes" in the next screen.
5Click "Customize Theme"
6Click the drop down menu titled "Theme options" at the top of the page and Select "Edit HTML/CSS"
7Under the Layouts folder, click on theme.liquid to open it up (Note: This may be called something different depending on your theme)

8Scroll down the page till you find the <body> tag, and paste the Localizer JavaScript directly below this tag.

9Click "Save".
Please note, the Localizer code will not be added to the first two pages of the checkout process; but it will be added to the 'success page' after a checkout has been completed. If you wish to see your first 2 steps of your Shopify checkout translated - you can do that by delegating a domain for the language. E.g. fr.yourdomain.